


Guide to Using the Rental Module in Odoo
A strong tool that may completely change the way you run your rental business is Odoo Rental Management. You may accelerate business growth, increase customer happiness, and optimize procedures by taking use of its features and advantages. Regardless of your industry—real estate, equipment leasing, or something else entirely—Odoo provides a scalable and adaptable solution to suit your requirements.
Putting Odoo Rental Management into practice could be the key to increasing your rental business’s productivity and profitability. The easiest approach to manage each phase of the renting process is with Odoo’s renting application. Utilize a single portal to schedule pickups, manage products, and sign paperwork.
Here’s how you can configure the Rental Module on your Odoo Database:

Step-by-step Guide to Rental Management in Odoo:
1. Install the Odoo Rental Module and configure the settings to get started.
There are a few things you need to configure before starting renting your products.
You can set the Default Padding Time and Default Delay Costs in the Rental section. Moreover, Digital Documents and Rental Transfers can be enabled.

1. Default Time Charges are extra fees for returns that arrive late.
2. By Default The bare minimum of time between two rentals is called padding time.
3. Stock deliveries and receipts can be used for rental orders under the terms of rental transfers.
4. Users can upload documents to Digital Documents so that clients can sign them before their rental is confirmed.
The Minimal Rental Duration and Unavailability days—days when pickup and return are not possible—can be configured in the Rent Online section.
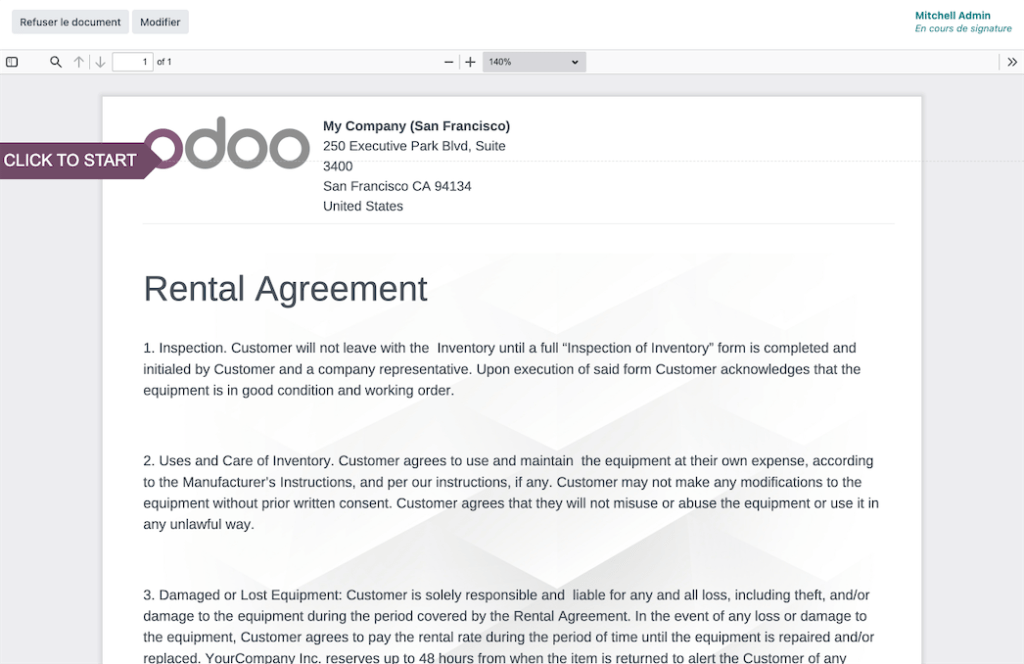
Rental Agreement
The rental agreement does not need to be uploaded for each and every order because it can be signed and uploaded online.If you are renting the things online, you might provide minimum rental periods and unavailability days to make it easier for everyone to keep track of the merchandise.
Upload rental agreements, insurance forms, contracts, and other necessary documents, and request a digital signature from the customer before any products leave your warehouse. This process ensures all paperwork is completed and validated electronically, streamlining your operations and enhancing security.
2. Add Rental Products, Pricing & Reservations
Go to the Products page in the Rental app, choose the product you want to change the rental price for, or click New to start from scratch and create a new product.
Make sure the Can Be Rented checkbox is checked on the product form. Next, select the option for rental costs.
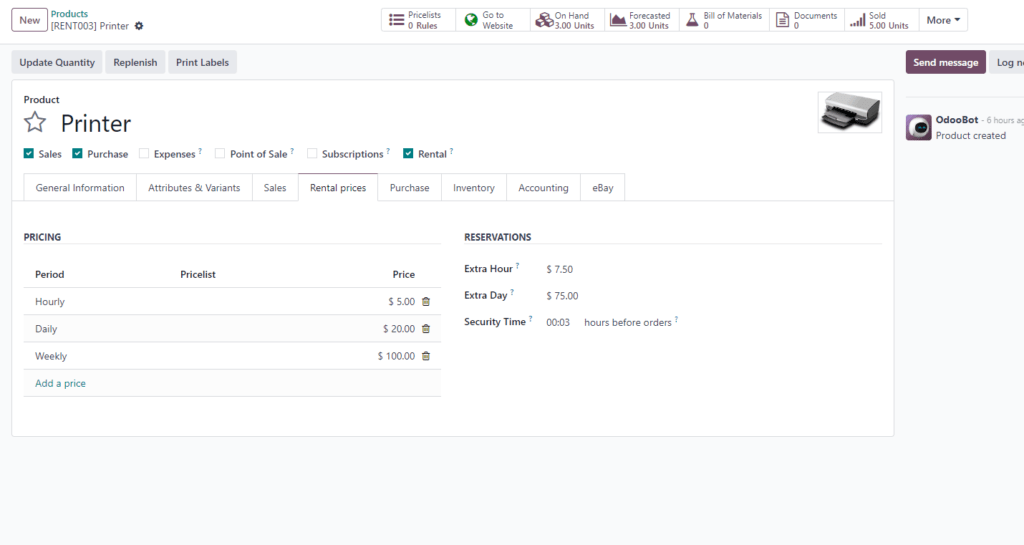
Pricing
Set the product’s custom rental pricing and rental durations under the Pricing section of the Rental prices tab.
Click Add a price to add rental cost. Next, select a pricing period (the length of the rental) from the list in the Period column, or type in a new one and click Create to start a new pricing period.
Next, choose if you want to apply this unique rental pricing to a particular Pricelist or not.
Finally, input the Price you want to use for that particular Period.
Reservations
You can set up additional fines for any Extra Hour or Extra Day that a customer takes to return a rental under the Reservations portion of the Rental pricing page.
Additionally, you can specify a Security Time in hours that will prevent the rental product from being available for a short while in between rental orders. A feature like this could come in handy if cleaning or maintenance is needed in between rentals.
3. Place Rental Order
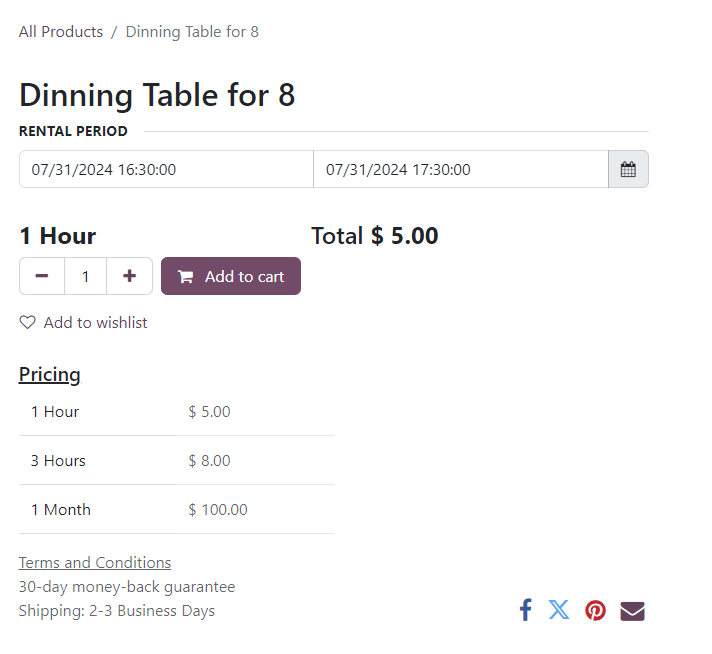
Effect on Front Website
The rental duration we have put up for each product is easily verified by customers through simple online purchases.
If customers verify products’ availability online, they can easily purchase them without having to fly back and forth. An easy and efficient shopping experience is guaranteed by this practical procedure.
Effect on Odoo Dashboard
Go to Rental app ‣ Orders ‣ Orders and select New to establish a rental order in the Rental app. When you do this, a blank rental order form appears, which you fill up appropriately.
First, add a customer, and then in the Rental period area, specify how long you would like the rental to last.
Click the first date in the Rental period column to change the rental duration. A pop-up calendar form will then display; choose the range of dates to represent the rental term.
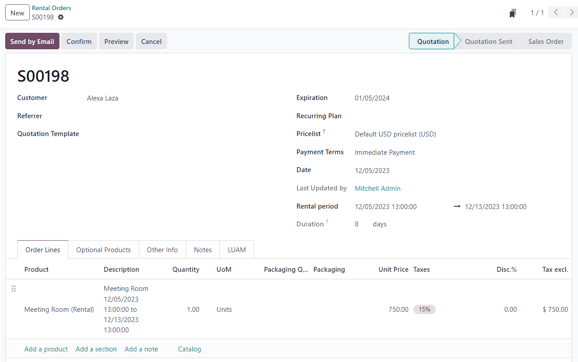
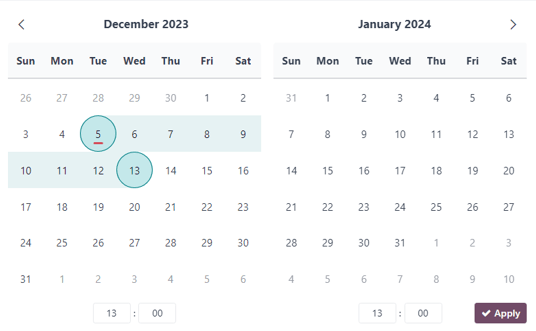
After finishing, select Apply in the pop-up calendar form. The specified duration of the rental is then displayed in the Duration field, and the pop-up form vanishes.
After that, click Add a product on the Order Lines tab and choose the rental product you want to add to the form.
Click the Send by Email button to send the customer a quotation when all the information has been accurately entered on the rental order form, or click the Confirm button to confirm the order.
4. Sign & Send Rental Agreement to Customers
Only when the Digital Documents feature is enabled in the Rental application settings will the Sign Documents button/option show up. To accomplish this, select Digital Documents from the menu under Rental app ‣ Configuration ‣ Settings, then click Save.
A rental order is confirmed, and then the Sign Documents button shows up. This allows the business to ask the client to sign a rental agreement detailing the terms of the deal before the client picks up the rental item or products.
These records can guarantee that everything is delivered on schedule and undamaged.
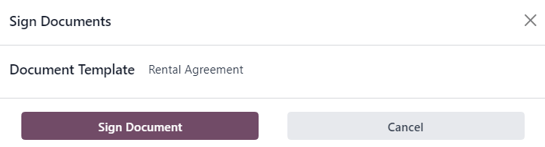
Choose a confirmed rental order, then click the Sign Documents button to open the Sign Documents pop-up window requesting the customer’s signature on a rental agreement.
Choose the required document by clicking on it in the Document Template area. Click Sign Document after that. A New Signature Request pop-up window appears when you do this.
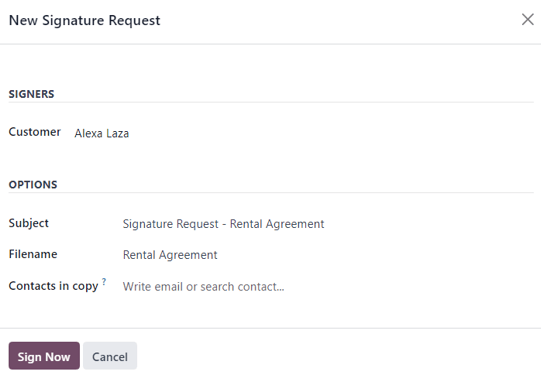
Once the data in the New Signature Request pop-up form has been verified, click Sign Now to start the signing procedure.
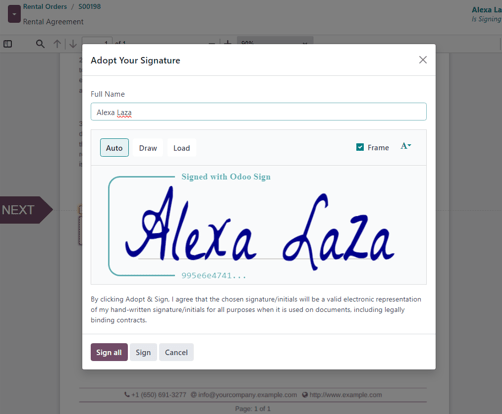
The document that needs to be signed is then shown on a different page that the customer can view through the customer portal.
With clickable, clear markers, Odoo walks the user through the signing process and lets them generate electronic signatures so they may finish the form fast.
Click the Validate & Send Completed Document button located at the bottom of the document after it has been signed and completed.
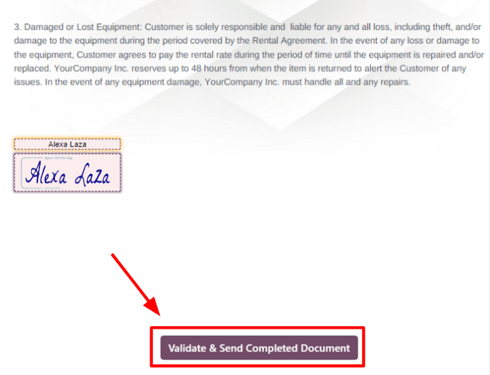
Odoo gives you the option to download the signed document for your records, if needed, when you click the Validate & Send Completed Document button.
5. Order Pick-up and Returns
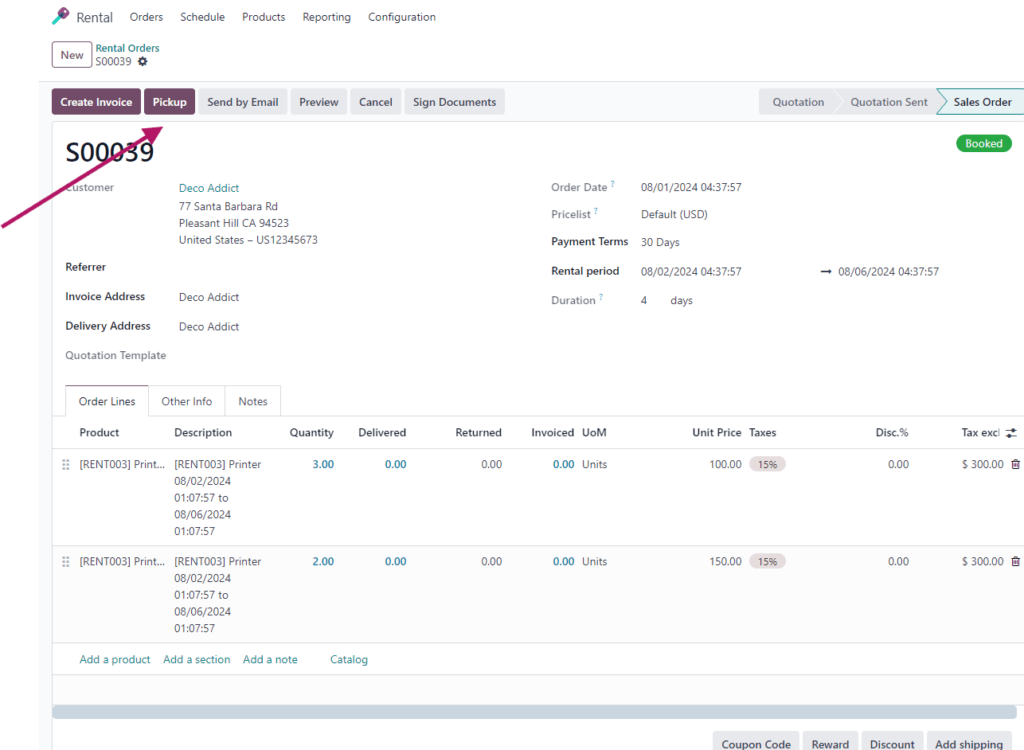
Navigate to the relevant rental order, select the Pickup option, and then click Validate in the Validate, a pickup pop-up form that displays after a customer picks up the product(s).
The rental order will display a Picked-up status banner as a result.
Upon receiving a return from a customer, go to the relevant rental order, click the Return button, and then confirm the return by selecting Validate from the pop-up form that appears.
When this is done, the rental order displays a Returned status banner.
Create and print receipts for pickup and return.
Customers can print receipts for pick-up and return of rental items when they do so.
Navigate to the relevant rental order and click the ⚙️ (gear) icon to reveal a drop-down selection in order to print pickup and/or return receipts.
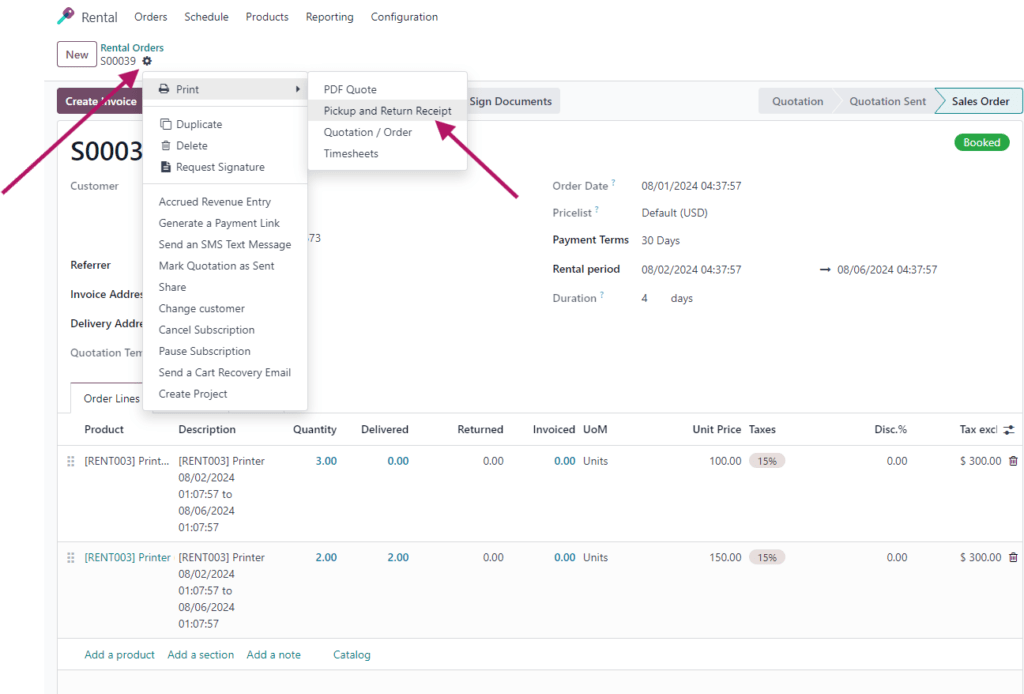
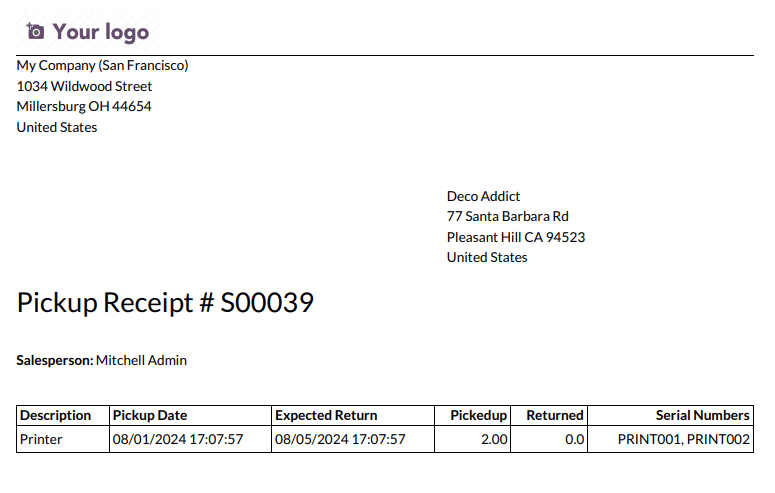
Hover your cursor over the Print option in this drop-down menu to see a sub-menu. Choose Pickup and Return Receipt after that.
Odoo creates and downloads a PDF that contains all the details regarding the state of the rented item(s) right now.
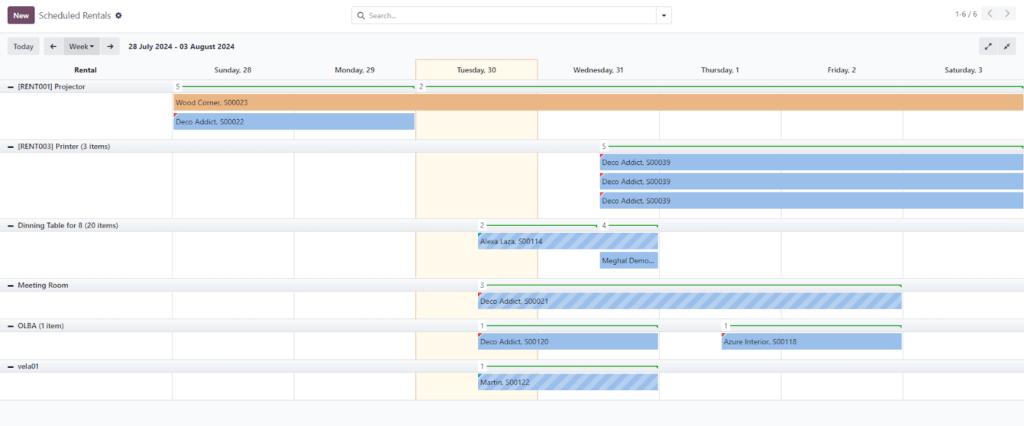
6. Scheduled Rents Visibility
You can see a clear picture of the products that customers have reserved by using this Gantt chart. The chart makes scheduled rents visually clear, making it simple to monitor and control product availability and rental durations. This gives you greater control over your rental operations by ensuring effective planning and assisting in the prevention of multiple bookings.
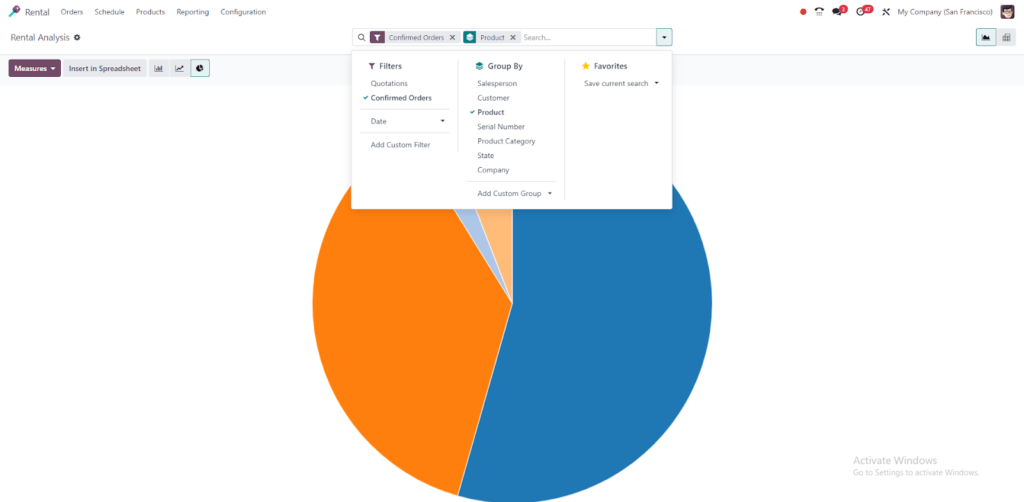
7. Easy Analysis and Reporting
You can easily examine product purchases and other consumer activities with the reports tab. To produce insights that are relevant to your needs, use customisable filters. This will help you watch trends, keep an eye on performance, and make data-driven decisions that will enhance your business operations.
In summary
We have given you a thorough rundown of how to use the Odoo Rental Module for your company in this article. Because of its user-friendly design, this module is simple to configure and apply in a variety of business contexts. Because of its adaptability, it may be highly customized to fit the particular needs of your business.
The Odoo Rental Module may increase productivity and optimize your operations whether you operate a car leasing company, an equipment rental company, or any other type of business where renting out assets is involved. This module’s flexibility guarantees that it may adjust to the unique requirements of your company, offering a customized solution that improves your rental management skills.
If you require any assistance with customisation or run into any problems when utilizing the Rental Module, our friendly support staff is available to assist you. Please contact us at support@vrajatechnologies.com if you need professional advice or assistance.
You may boost client satisfaction, develop your business, and optimize your rental operations by utilizing the Odoo Rental Module. We sincerely hope that this advice has been useful, and we are eager to help you on your path to a more effective rental management system.


01 Comment
Odoo Rental Sale Management | Rent Products in Odoo
15/05/2026[…] Odoo, rental management is a multifaceted process that is simple, quick, dependable, and uncomplicated. The rental […]